A Helpful Guide for Our Windows DUC Users
Our DUC series continues! In a previous blog, we discussed what you need to know about our Mac DUC and some of its unique features. In today’s blog, we will discuss our Windows DUC.
Again, Our DUC continually checks for IP address changes in the background and automatically updates the DNS at No-IP whenever it changes for devices that are not already integrated with No-IP.
Take a look below at the installation process, specialized features, and some helpful tips.
Installation Process
The installation process for the Windows DUC includes a few more steps than the Mac DUC. However, it is straightforward and easy to follow. The first step is to download the Windows version of the DUC.
Note: Make sure you are downloading the DUC according to the version of Windows that you are using. For example, if you are using our newest DUC on an older version of Windows, you may face a “Time Out” error when logging in or a failure to retrieve your hostnames. If you are using an older version, there is the previous release of the DUC that may work, it can be found here.
Then, hit Save File:

After you save the file, double-click the downloaded file and follow the on-screen instructions.
Once the installation is complete, the application will ask for your account information. After your username and password have been authenticated, you will be shown a list of hostnames. Select the hostnames that you would like updated to the IP address of your network.
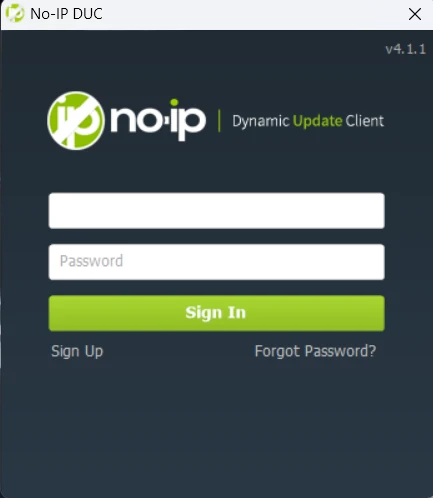
After the installation has finished, the application should launch and ask you to enter your No-IP account credentials.
Note: If you created a DDNS Key or signed up with a Google Single Sign On (SSO), you can use that Username and Password to log in instead of your No-IP account credentials.
First Time Log in
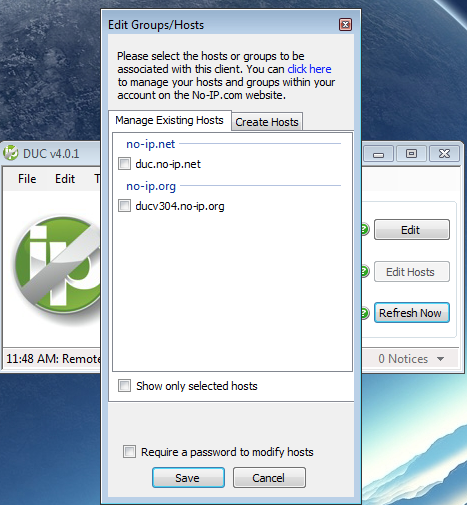
When you first log in, you will need to select the hostnames or group you want to associate with this client. The hostname(s) you select will be updated with the public IP address of the network where the DUC is currently installed.
Note: You can edit this any time after you save the settings by clicking Edit Hosts on the DUC v4.x.
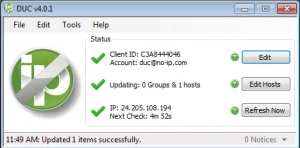
After you have selected your hostname(s) and saved your settings, you should see three green check marks. Three green check marks mean everything is working correctly and that you’ve successfully installed and configured the DUC. Succes! Your hostname will now be updated if your IP address changes.
Enhanced Preferences
Here are a few enhanced preferences that may help elevate your Windows DUC experience:
- You need to be sure your computer and DUC are running at all times if you want your hostname to always be updated. If you are not running the DUC and your IP address changes, No-IP will be unable to detect a change. To ensure that your DUC always starts, go to “File” in the DUC and click “Preferences” then check “Start this application automatically when this user logs on.”
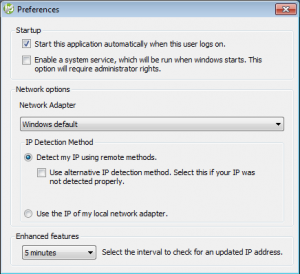
- Checking “Use Alternative IP detection method” can help if your IP is not being detected correctly or if it is detecting the wrong IP address. Along with “Use alternative IP detection method” is “Network Adapter”, it is best to leave this setting set to “Windows Default”, changing it can cause detection failing.
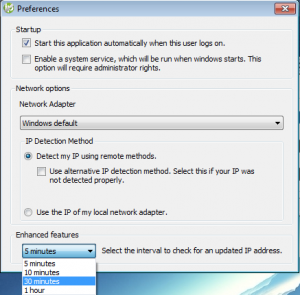
- As shown here, the update interval for the DUC can be configured to your liking, but it can not be set faster than 5 minutes. Additionally, Plus Managed DNS and Enhanced Dynamic DNS users can choose to create hostnames from the No-IP DUC interface by navigating to Edit Groups/Hosts.
Take a look at the Installation Guide to read up on the rest of the Enhanced Preference.
Special Features
There are a number of key features of the Windows DUC:
- Secure Key Based Updates
Our secure DUC does not resend your No-IP credentials each time it sends an IP address update, instead it sends a unique key for username and password for your specific Dynamic Update Client. - Client Tracking
This feature allows you to see a list of each location where you have a DUC installed. You can also set each update Client ID to a custom name for example, home, work, client name, etc to help keep track of each. - Host Creation (Plus & Enhanced Users)
If you are an Enhanced Dynamic DNS or Plus Managed DNS customer, you are able to easily add hostnames directly from the Dynamic Update Client. - Runs When Logged Out
If your computer is running, your hostname will still be updated when your IP address changes. - Notifications
Receive notifications when a service is about to expire, or if we send out an important network update. - DUC v4.1.1 Runs On Windows 10 & Up
Please contact us or take a look at our Knowledge Base article if you need support for an earlier os version. The article also includes a direct link to the older DUC download as an option.
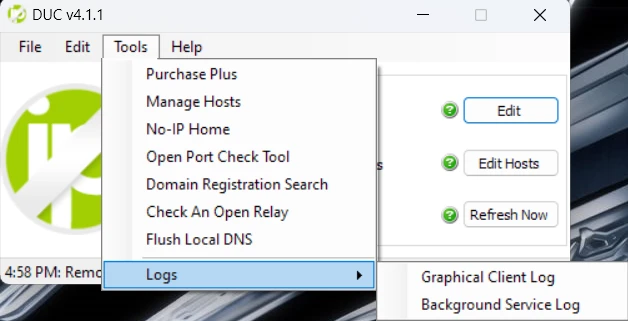
Windows DUC Logs
One of the most popular inquiries regarding DUC is how to find logs. Take a look at the steps below to find out how to find the Windows DUC logs.
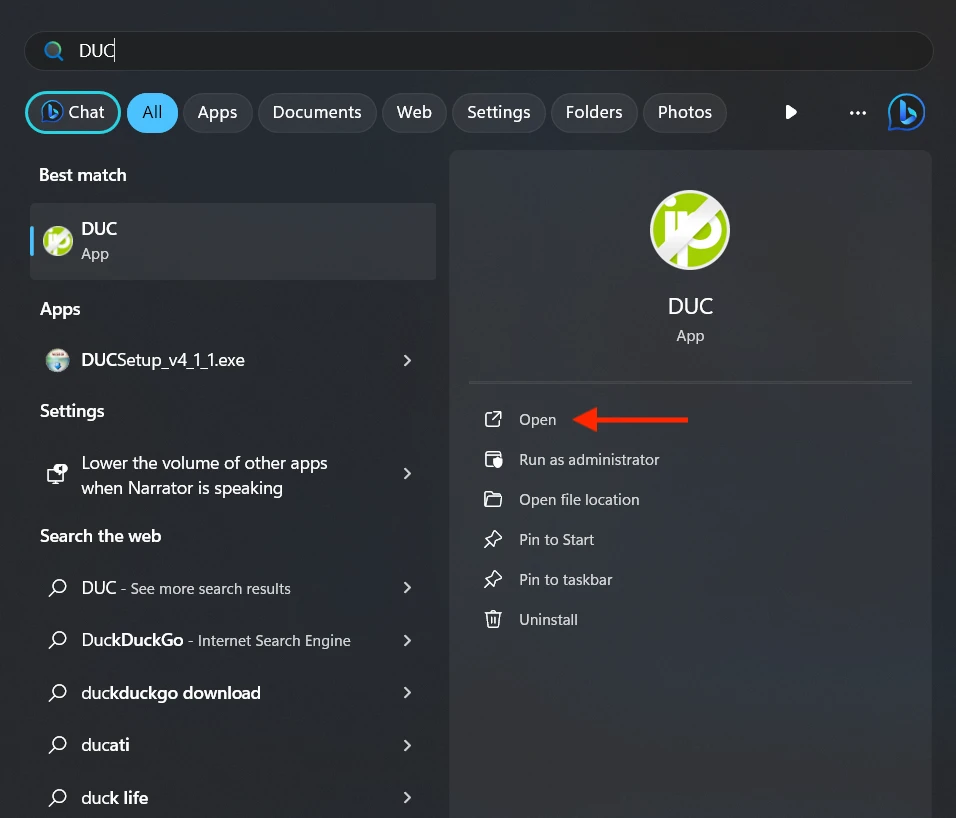
First, open the Windows DUC: Open the Start menu with the Windows key and type “DUC”.
If you are not already logged in, use your No-IP account credentials to do so. However, if you created a DDNS Key for your host, use those credentials instead.
Click Tools on the menu bar at the top.
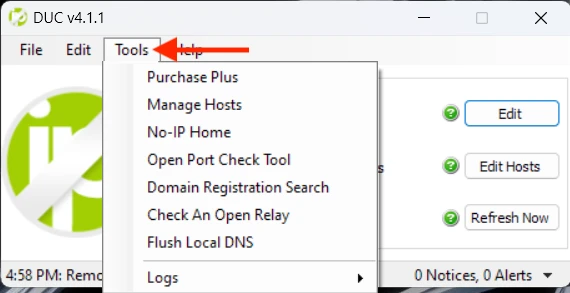
Highlight Logs, then select one of the options:
- Graphical Client Log should include your DDNS update logs for your host.
- Background Service Log should include the actual actions being performed.
To learn more about Windows DUC logs, such as exporting logs to a text file, take a look at our Knowledge Base article.
Endless Possibilities at your Fingertips
Want to learn more? Reach out to our Customer Support team for more information.